Iron on patches canada
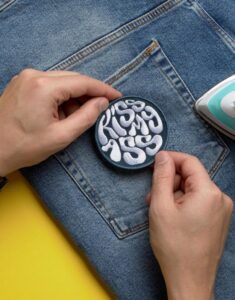
iron patches One of the simplest and least expensive ways to update your clothes is with iron-on patches. The patches make it easy to fix a rip in your favorite jeans, customize a denim jacket, or add style to a backpack. What’s the best part? You don’t need to be an expert sewer.
Think of iron-on patches as fabric stickers, only more durable and robust. All it takes to turn plain clothes into something distinctive and expressive is heat and pressure. Students, fashionistas, do-it-yourselfers, and even companies wishing to personalize uniforms are fond of them.
The problem is that they can peel off after just one wash if you don’t apply them correctly. Isn’t that annoying? The good news is that it’s easy to iron patches correctly.
Comprehending Iron-On Patches Iron-On Patches: What Are They?
Iron-on patches are pieces of fabric with a heat-activated adhesive backing that can be used as decorations or functional pieces. The adhesive melts and forms a bond with the fabric underneath when heat is applied. It solidifies and forms a firm grip after cooling.
Numerous designs are available for them, including letters, cartoon characters, military badges, logos, floral patterns, and more. They are used by some to express their sense of style. Others fashionably fix damaged garments with them.
Iron-on patches are quicker than sew-on ones. Although a needle and thread are not necessary, they still need to be handled carefully because fabric types and heat settings are more important than you might imagine.
When Should You Use Them?
Iron-on patches are best used in the following situations:
As a quick fashion makeover.
To conceal small holes or spots on clothing.
For customizing uniforms or team jerseys.
For personalizing bags, caps, or jackets.
They are best suited for cotton, denim, and polyester fabric mixes. But for more delicate fabrics such as silk or stretchy fabrics, the adhesive may not stick well.
Tools and Materials You’ll Need
Before you begin, make sure you have all the materials. This will make the whole process easy and hassle-free.
Essential Equipment Checklist
Here’s a list of what you will need:
Iron (without steam function)
Iron-on patch
Cleaned garment
Ironing board or heat-resistant surface
Thin cloth or parchment paper
That’s it. Easy, right?
Optional Equipment for Better Results
If you want a more long-lasting result, you can use the following equipment:
Pressing cloth
Sewing needle and thread (for reinforcement)
Heat-resistant gloves
Ruler for precise alignment
Having these items around will make sure that you don’t go scrambling in the middle of the process.
Choosing the Right Fabric
Not all fabrics react the same way to heat. Some fabrics love it. Others? Not so much.
Fabrics That Work Best
- The best fabrics for iron-on patches include:
-
- 100% cotton
-
- Denim
-
- Canvas
-
- Polyester blends
- These materials can handle high heat and allow the adhesive to bond effectively.
Fabrics to Avoid
Avoid applying patches to:
- Silk
- Nylon
- Rayon
- Leather
- Waterproof fabrics
- These materials may melt, scorch, or resist adhesion. If you’re unsure, always test a small hidden area first.
Step-by-Step Guide: How to Iron Patches
Step 1: Set the Correct Temperature
Turn off the steam setting. Steam weakens adhesion. Set your iron to the highest temperature safe for your fabric—usually the cotton setting.
Let it heat fully before starting.
Step 2: Protect the Patch
Place a thin cloth or parchment paper over the patch. This prevents direct heat damage and protects both the patch and iron.
Step 3: Apply Heat and Pressure
Press the iron firmly on top of the covered patch. Hold it in place for 15–30 seconds. Do not move it around like normal ironing.
Lift, reposition slightly, and repeat if needed to cover all edges.
Flip the garment inside out and press the backside for another 15–20 seconds. This strengthens the bond.
Step 4: Check Adhesion
Let the patch cool completely. Then gently lift a corner. If it lifts easily, repeat the process with more pressure.